
Goal
In this post, step by step I create a web app using Entity Framework core and razor pages. The app is a library that admin can CRUD books info on a database and authenticated users can browse the records.
Result
Create Project
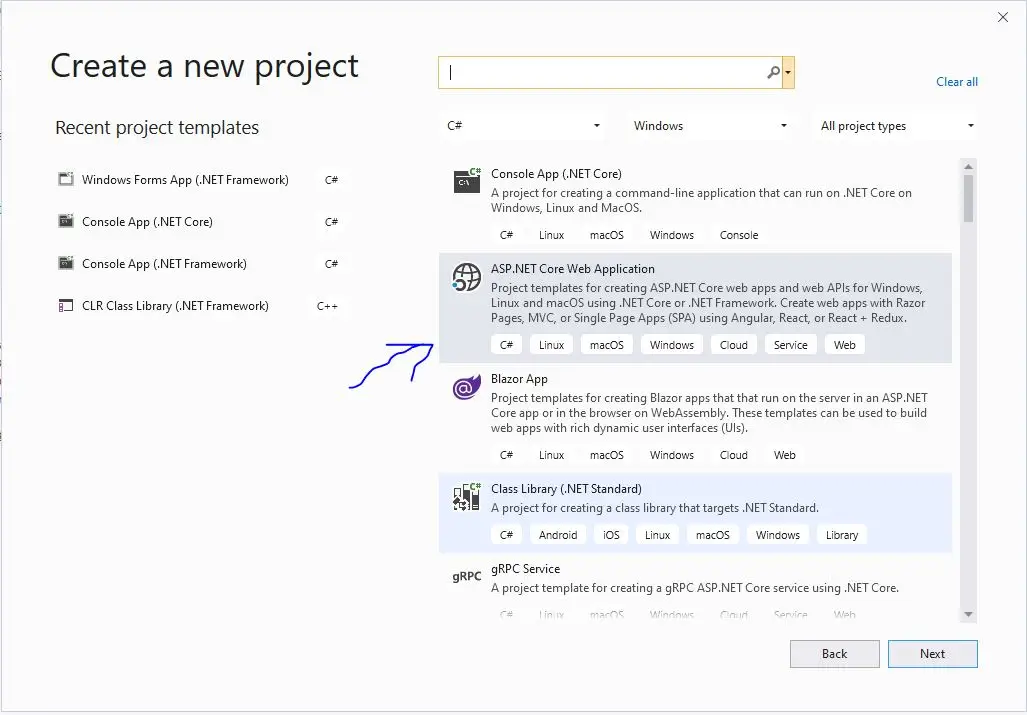
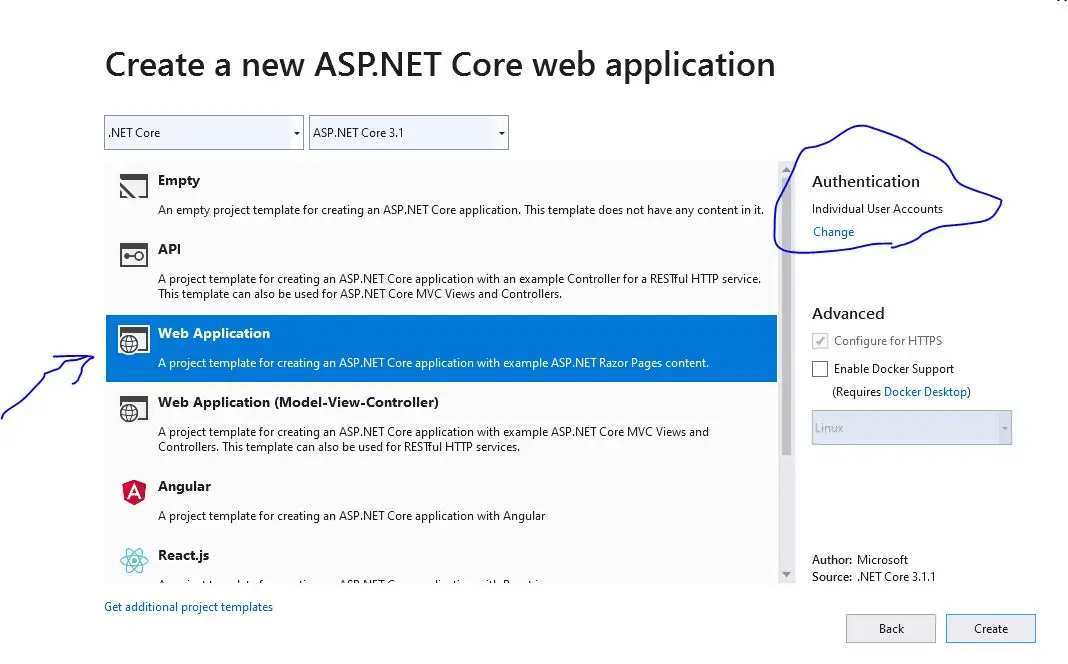
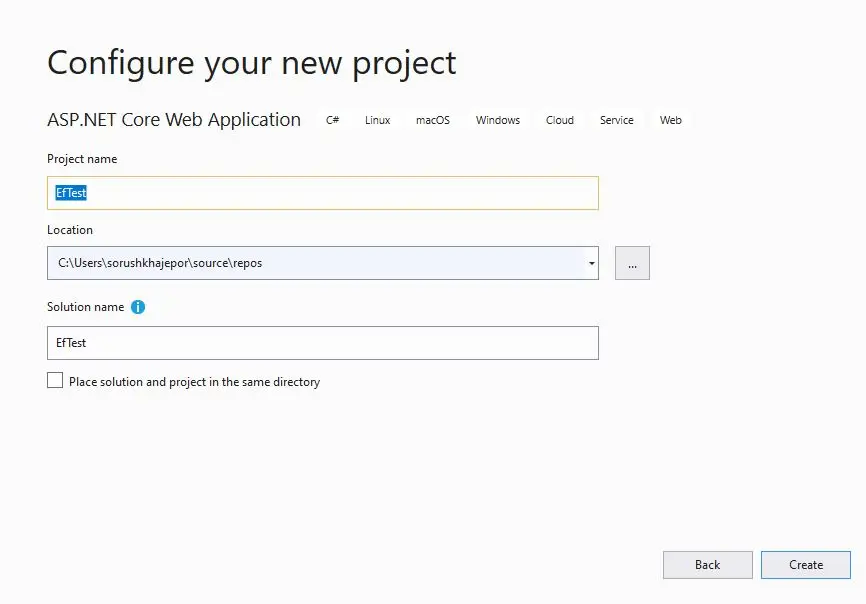
Open visual studio (mine is 2019 v16.7), click on Create a new project and follow the below pictures
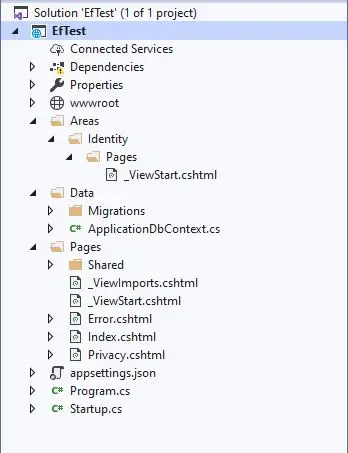
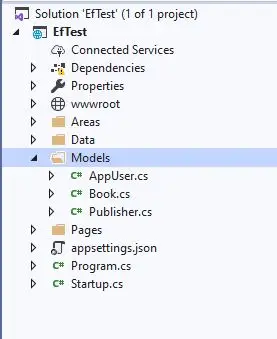
You will have a project like below
Create EF Models
Models can contain any logic, but here models refer to tables in the database. Create the folder and files like below
When we defining a model (or table here), we not only consider columns of the table but also it’s a relationship with other models (or tables). In this example, I only focus on the one-to-many relationship. Each book has a publisher, and each publisher has many books.
Publisher Model
In Publisher.cs I have
using System;
using System.Collections.Generic;
using System.Linq;
using System.Threading.Tasks;

namespace EfCoreRazorCrud.Models
{
    public class Publisher
    {
        public int Id { get; set; }
        public string Name { get; set; }

        public ICollection<Book> Books { get; set; }
    }
}
Id must be named Id so EF set it as the primary key of Publisher table. Name is an example of a table column, other columns can be added by defining new properties like address and website. The last line will not create a column but is an EF core convention to create a one-to-many relationship that each publisher has many books. The properties which are not primitive type like Book are called navigation properties.
Book Model
We can mention the relationship in the Book class, see Book.cs:
using System;
using System.Collections.Generic;
using System.ComponentModel.DataAnnotations.Schema;
using System.IO;
using System.Linq;
using System.Threading.Tasks;

namespace EfCoreRazorCrud.Models
{
    public class Book
    {
		public int Id { get; set; }
		public string Title { get; set; }

		public int PublisherId { get; set; }
		public Publisher Publisher { get; set; }

		[NotMapped]
		public string FilePath
		{
			get { return Path.Combine("..","pdf",Title + ".pdf"); }
		}

	}
}
In Book class, Id is the default primary key, Title is an arbitrary column in the Book table, more can be added like author, year, and edition. PublisherId and Publisher are EF core conventions to have the relationship that each book has a publisher. Here Publisher is the navigation property. Note that the foreign class id and name must follow the convention class name + Id and class name.
If a property needs to be ignored by EF core, like File Path, annotate it with [NotMapped].
To have a one-to-many relationship, mentioning the relationship in the Book class was not necessary. Personally, I prefer to have them in the Book class, so when a Book record is pulled from the database, automatically its corresponding publisher is found too.
AppUser Model
IdentityUser is the default class that .Net core uses for user authentication. It contains username, email, password and related information. To add custom properties to the class we have to derive another class, AppUser here. AppUser.cs file contains
using Microsoft.AspNetCore.Identity;
using System;
using System.Collections.Generic;
using System.Linq;
using System.Threading.Tasks;

namespace EfCoreRazorCrud.Models
{
    public class AppUser : IdentityUser
    {
        public string Name { get; set; }
    }
}
I added only property Name but any arbitrary column table can be added like StartMembership, EndMembership, or a one-to-many relationship with Book class to denote the books a user borrowed.
AppUser in Startup
We have to modify ConfigureServices in Startup.cs so it uses the new AppUser class instead of the default IdentityUser:
public void ConfigureServices(IServiceCollection services)
{
    // some codes here ...
    services.AddDefaultIdentity<Models.AppUser>(
        options => options.SignIn.RequireConfirmedAccount = true)
        .AddRoles<IdentityRole>()
        .AddEntityFrameworkStores<ApplicationDbContext>();
    // rest of the code ...
}
Make sure .AddRoles<IdentityRole>() is there as well which is necessary to have roles like admin, user, and so on.
There are other instances of IdentityUser in other files, simply find all them by Ctrl+f replace them with Models.AppUser. Otherwise you get some errors.
I found two of them in _LoginPartials.cshtml:
@inject SignInManager<Models.AppUser> SignInManager
@inject UserManager<Models.AppUser> UserManager
ApplicationDbContext
ApplicationDbContext.cs is changed to have the name of tables
    public class ApplicationDbContext
                : IdentityDbContext<AppUser> //Note AppUser
    {
        public ApplicationDbContext(DbContextOptions<ApplicationDbContext> options)
            : base(options)
        {
        }

        protected override void OnModelCreating(ModelBuilder modelBuilder)
        {
            base.OnModelCreating(modelBuilder);

            SeedData(modelBuilder);
            AddAdmin(modelBuilder);
        }

        public DbSet<Book> Books { get; set; }
        public DbSet<Publisher> Publishers { get; set; }

	// rest of the code ...
    }
}
Seed data
SeedData is created to initialize the database with some test records:
private void SeedData(ModelBuilder modelBuilder)
{
    modelBuilder.Entity<Publisher>().HasData(
        new Publisher() { Name = "Little, Brown and Company", Id = -1 },
        new Publisher() { Name = "Scholastic", Id = -2 }
        );
    modelBuilder.Entity<Book>().HasData(
        new Book() { Id = -1, Title = "Harry Potter And The Cursed Child", PublisherId = -1 },
        new Book() { Id = -2, Title = "The Hunger Games", PublisherId = -2 }
        );


    modelBuilder.Entity<AppUser>().HasData(

        new AppUser()
        {
            Id = Guid.NewGuid().ToString(),
            UserName = "a@test.com",
            NormalizedUserName = "a@test.com".ToUpper(),
            Email = "a@test.com",
            NormalizedEmail = "a@test.com".ToUpper(),
            EmailConfirmed = true,
            SecurityStamp = string.Empty,
            PasswordHash = HashPassword(null, "pass")
        });
}
and I added the admin here as well
private void AddAdmin(ModelBuilder modelBuilder)
{
    string adminId = Guid.NewGuid().ToString();
    string roleId = Guid.NewGuid().ToString();


    modelBuilder.Entity<IdentityRole>()
    .HasData(new IdentityRole {
        Id = roleId,
        Name = "Admin",
        NormalizedName = "Admin".ToUpper() });

    modelBuilder.Entity<AppUser>().HasData(
        new AppUser()
        {
            Id = adminId,
            Name = "admin",
            UserName = "admin@test.com",
            NormalizedUserName = "admin@test.com".ToUpper(),
            Email = "admin@test.com",
            NormalizedEmail = "admin@test.com".ToUpper(),
            EmailConfirmed = true,
            SecurityStamp = string.Empty,
            PasswordHash = HashPassword(null, "pass")

        });

    modelBuilder
    .Entity<IdentityUserRole<string>>()
    .HasData(new IdentityUserRole<string>
    {
        RoleId = roleId,
        UserId = adminId
    });
}
IdentityUser saves the hash of a password, so I created the below function for that purpose:
string HashPassword(AppUser user, string password)
{
    var hasher = new PasswordHasher<AppUser>();
    return hasher.HashPassword(user, password);
}
Seed data in Startup
we visit Startup.cs again and add the below function apply seed data on startup
private static void UpdateDatabase(IApplicationBuilder app)
{
    using (var serviceScope = app.ApplicationServices
        .GetRequiredService<IServiceScopeFactory>()
        .CreateScope())
    {
        using (var context = serviceScope.ServiceProvider.GetService<ApplicationDbContext>())
        {
            context.Database.Migrate();
        }
    }
}
and call it as below
public void Configure(IApplicationBuilder app, IWebHostEnvironment env)
{
    UpdateDatabase(app); // should be first line
    // rest of code
}
Create authorized folders
Now we create two folders in pages: Admin and Users
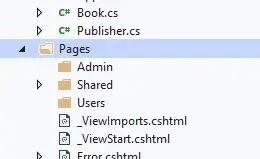
Any page in folder Admin is only visible by admin, and any page in Users folder is visible by authenticated users.
Let’s define these rules in Startup.cs, the final ConfigureServices shown below
public void ConfigureServices(IServiceCollection services)
{
    services.AddDbContext<ApplicationDbContext>(options =>
        options.UseSqlServer(
            Configuration.GetConnectionString("DefaultConnection")));
    services.AddDefaultIdentity<Models.AppUser>(options => options.SignIn.RequireConfirmedAccount = true)
        .AddRoles<IdentityRole>()
        .AddEntityFrameworkStores<ApplicationDbContext>();

    services.AddAuthorization(options =>
    {
        options.AddPolicy("Admins", policy =>
        {
            policy.RequireRole("Admin");
        });
    });

    services.AddRazorPages(options =>
    {
        options.Conventions.AuthorizeFolder("/Users");
        options.Conventions.AuthorizeFolder("/Admin", "Admins");

    });
}
Add and apply migrations
We are pretty much set, now we apply the migrations. In the Package Manager Console, run the command
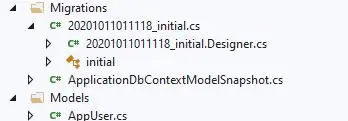
add-migration initial
The migrations are created and added to the Migration folder
Then we can run
update-database
to test the migrations.
If everything is set up correctly, no error will come up and in the SQL Server Object Explorer window of visual studio, you can find the database and tables
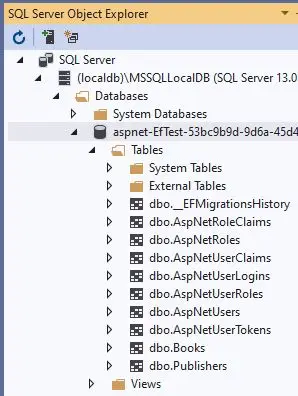
Note that the update-database command creates the database and tables, but is not necessary in our app because UpdateDatabase method, which is defined in Startup.cs in Seed data in startup above, does the same automatically at startup. Therefore, if this project is deployed to a remote server the database and tables are created automatically with seed data.
When testing, another migration useful command is drop-database which deletes the database.
Almost Done
Now from the EF core point of view, we are done.
Create Razor pages
We need to create some pages to finish the app. Create crud folders in Admin and Users folders

Right-click on Admin/BookCrud folder and Add -> New Scaffolded Item -> Rezor Pages -> Razor Pages Using Entity Frame Work. Choose Book class and ApplicationDbContext as below
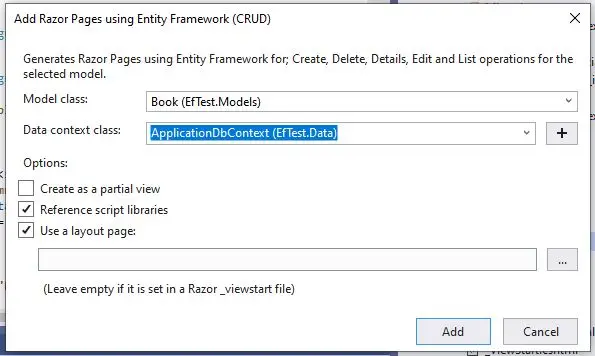
Hit create button and visual studio creates Book crud pages
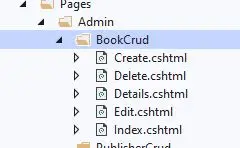
Before, you add the scaffolded items for others, change the namespace of new files from EfCoreRazorCrud to EfCoreRazorCrud.Admin.BookCrud. So namespaces coincide with the folders, and new scaffolded items have their own folder, so it won’t be confused with the others. Do the same for Admin/PublisherCrud and Users/BookRead: create scaffolded items then change their namespace to their folder. Because users are not allowed to crud, delete Create, Delete, Edit pages and their references.
Add pages to _Layout.cshtml
To visit these pages, we put their link in _Layout.cshtml. Because we need to know if a visitor is a user, admin or anonymous, the below objects are injected in top of the page
@using Microsoft.AspNetCore.Identity
@inject SignInManager<Models.AppUser> SignInManager
@inject UserManager<Models.AppUser> UserManager
And where the links are we add
<li class="nav-item">
    <a class="nav-link text-dark" asp-area="" asp-page="/Index">Home</a>
</li>
@if (SignInManager.IsSignedIn(User) && User.IsInRole("Admin"))
{
    <li class="nav-item">
        <a class="nav-link text-dark" asp-area="" asp-page="/Admin/BookCrud/Index">Crud Books</a>
    </li>
    <li class="nav-item">
        <a class="nav-link text-dark" asp-area="" asp-page="/Admin/PublisherCrud/Index">Crud Publisher</a>
    </li>
}
@if (SignInManager.IsSignedIn(User))
{
    <li class="nav-item">
        <a class="nav-link text-dark" asp-area="" asp-page="/Users/BookRead/Index">See Books</a>
    </li>
}
So admin can crud but users only can see the books.
Run the app
Now we can run the app, and use the Admin email and password mentioned in SeedData to login, then crud Books and Publishers. There is just one gotcha
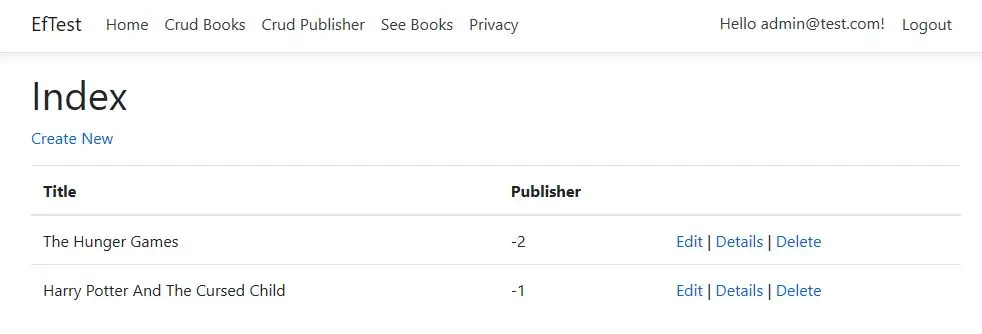
Show names instead of id’s
We don’t want to see publisher id. We want to see the name of the publisher, so in Admin/BookCrud/Index.cshtml and Users/BookRead/Index.cshtml change
@Html.DisplayFor(modelItem => item.Publisher.Id)
to
@Html.DisplayFor(modelItem => item.Publisher.Name)
There is one more problem in Admin/BookCrud/Create page, still publisher id appears
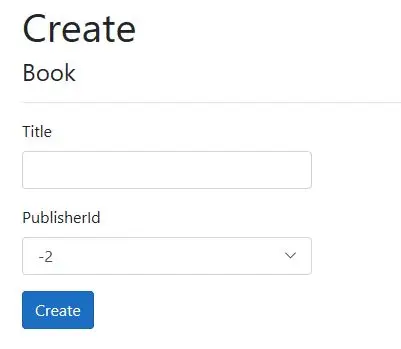
To fix this, in the code behind of Admin/BookCrud/Create change
ViewData["PublisherId"] = new SelectList(_context.Publishers, "Id", "Id");
to
ViewData["PublisherId"] = new SelectList(_context.Publishers, "Id", "Name");
Now you should see the name of publishers to select rather than their Id.
Code on Github
If face any problem, you can compare your project with mine on Github.